Questions?
(800) 604-5537
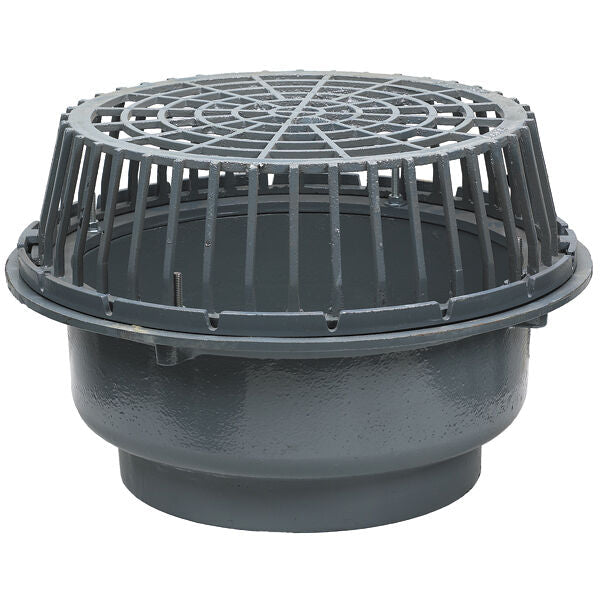
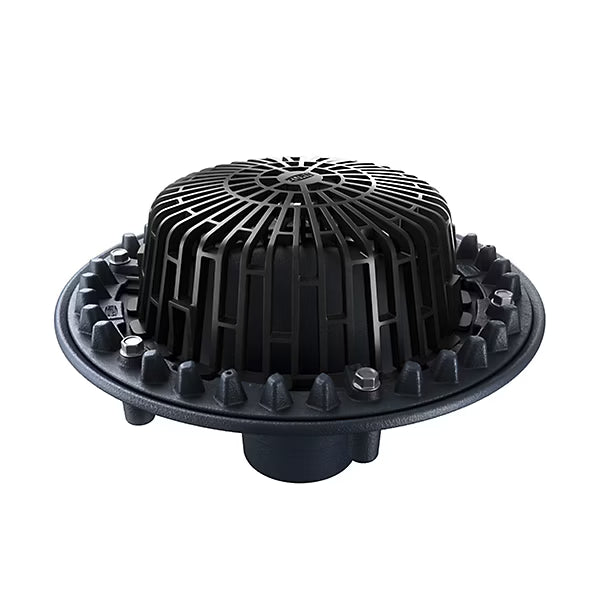
The roof drains collection provides a wide range of solutions designed to protect buildings by efficiently directing rainwater away from rooftops. The lineup includes primary drains, overflow and combination systems, control-flow models, siphonic drains, dual-outlet options, retrofit products, and specialty drains for green roofs, promenades, and decks. Each is built with durable components such as cast iron bodies, flashing clamps, and domes or strainers that prevent clogging while maintaining high flow capacity. Specific designs address unique challenges—for example, low-profile domes reduce head pressure, while siphonic drains enable fewer downspouts and simplified piping layouts. Control-flow systems regulate discharge rates to safeguard sensitive structures. Technical data, including tested flow performance and compliance with recognized standards, supports accurate specification and installation. With accessories like risers, plates, and extension rings, these drains can be adapted to different roofing conditions, giving architects and contractors reliable, code-compliant drainage solutions that extend roof and building longevity.
How they work, how to size and place them, installation best practices, maintenance tips, and a real-world case study.

Function: A roof drain collects rainwater or snowmelt at low points on flat or low-slope roofs and sends it into vertical leaders and storm piping so it leaves the building safely. In other words, it’s a controlled “funnel” that prevents ponding, leaks, and structural stress.
How it works (technical → simple): The drain body and dome (strainer) sit flush with the roof membrane and filter debris (technical), which simply means they stop leaves and gravel from clogging the pipes (simple). Water then flows through the drain outlet into interior piping that discharges to grade or a storm system.

Engineer’s view: Drain sizing is based on rainfall intensity (local code rainfall rate), roof area tributary to each drain, allowable ponding depth, and pipe hydraulics.
Practical takeaway: Space drains so each serves a manageable zone, position them at natural low points or in sumps, and always include code-compliant secondary drainage (scuppers or overflow drains) to protect against blockage.

Context: A 240,000-sq-ft distribution center experienced recurring ponding and interior leaks during cloudbursts. Existing scuppers were insufficient for updated local rainfall intensities.
Approach: The team added interior cast-iron roof drains at new sump points, tied to upsized storm leaders, and introduced code-compliant overflow drains. Field crews performed membrane re-flashing and a full water test.
Result: Post-retrofit monitoring showed the roof cleared water within 30 minutes of peak events, leak tickets dropped by ~90%, and infrared scans indicated dry insulation. The owner deferred a costly re-roof and implemented a seasonal debris check protocol.
Yes—codes require a secondary means of drainage (overflow drains or scuppers) so that if a primary drain clogs, water will still exit the roof without dangerous ponding.
Count and spacing depend on roof area, slopes, and local rainfall intensity. Practically, it’s better to use more drains serving smaller zones than too few drains tasked with large areas.
Outlet size is determined by rainfall rate and tributary area. Common commercial outlets are 3–6 inches; verify with the plumbing engineer and local code tables.
Cast iron is the commercial standard for durability and fire resistance. PVC can be suitable for lighter-duty applications where permitted. Use stainless or special coatings in corrosive environments.
At least seasonally and after major storms. Establish a documented check routine so debris never accumulates to the point of restricting flow.